Installing Debian on a second Cobalt Qube
November 26, 2007
Not too many people get two Cobalt Qubes free. I think I must be unique in this respect. The first came to me from a friend; the second I got off a group named Melbourne Freecyle. As the name indicates, people post to this group, advertising things they would like to give away gratis.
The Qube had the customised version of Red Hat which comes on the machine and just 16 MB of RAM. Luckily I had a 64-MB strip lying around; there was a kernel panic when I attempted the install with the 16MB strip.
Thanks are due to my colleague and friend, Peter Giorgilli, for the server and many helfpul hints; and Martin Michlmayr, the former head of the Debian GNU/Linux Project, whose guide to installing Debian on the MIPS platform was invaluable.

To install Debian on the Cobalt Qube 2, you will need a null modem cable, a crossover cable, a second PC (which will be called the server henceforth), and the Cobalt Qube 2, of course.
I used a PC with two network cards as server; one was used to connect the Cobalt via a crossover cable and the second was connected to my home network and hence to the internet. I set up things in the classical way, using different subnets - the Cobalt and eth1 were on 192.168.2.0 and the second NIC was on 192.168.1.0 which is what I use for my home LAN.
I run only Debian GNU/Linux so all the stuff below is Debian-specific. But anyone can adapt the instructions for any Linux distribution.
The Cobalt comes with a customised version of Red Hat (with a 2.0 kernel); it can be accessed through a web interface.
The only way to install an operating system is through a network install as it has no CD-ROM or floppy.
First, set up a DHCP server and NFS server on the server.
apt-get install dhcp3-server nfs-user-server
The Cobalt will pull files from a directory on the server to boot; edit the /etc/exports file and add the following:
/nfsroot 192.168.2.0/255.255.255.0(ro,no_root_squash)
You can use different IPs but the Cobalt firmware expects the boot files to be in /nfsroot so you have to use this.
You need to find out the MAC address of the primary network interface on the Cobalt. To obtain this, connect the primary network interface of the Cobalt to the server using a crossover cable and issue this command as root in a terminal on the server:
tcpdump -e -i eth0
I am assuming that the Cobalt is connected to eth0.
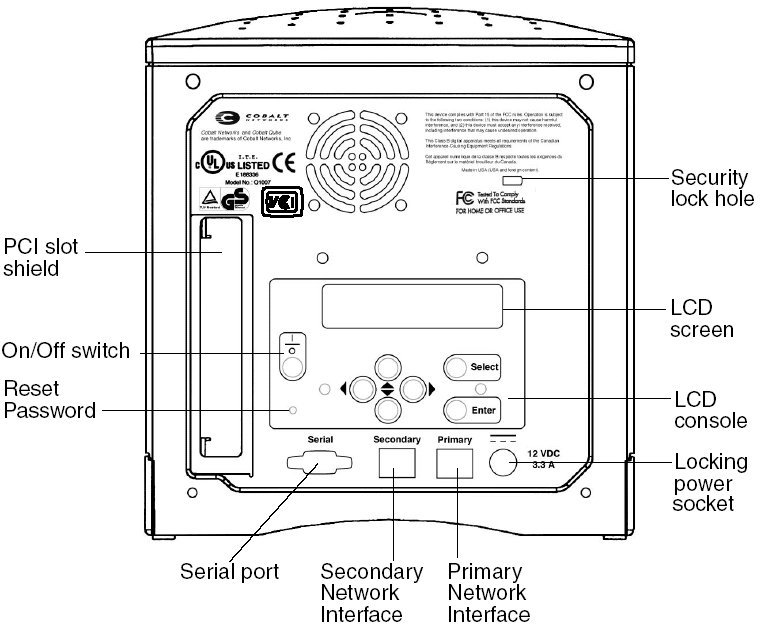
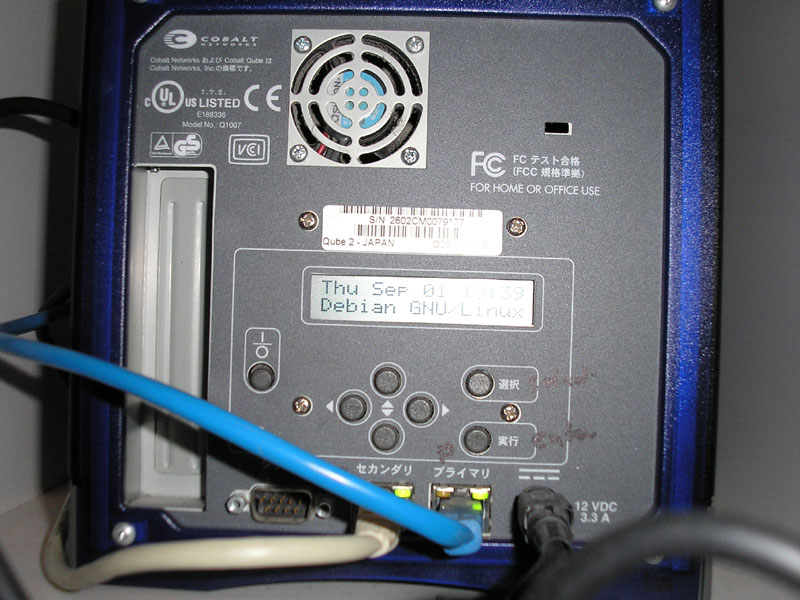
Now start the Cobalt and hold the two cursors on the right and left down together so that it boots from the network. You will see the words "Net booting" on the LCD panel at the back.
You will see some output like this in the terminal:
23:49:02.001492 00:10:e0:00:be:5e Broadcast ip 406: 0.0.0.0.bootpc > 255.255.255.255.bootps: xid:0x61e38099 secs:5 file ""[|bootp]
The bit in bold is the MAC address of the network interface on the Cobalt.
Now configure your DHCP server; edit /etc/dhcp3/dhcpd.conf and add the following:
option domain-name-servers 192.168.1.1;
subnet 192.168.2.0 netmask 255.255.255.0 {
range 192.168.2.2 192.168.2.100;
}
host cobalt {
hardware ethernet 00:10:e0:00:46:46;
fixed-address 192.168.2.2;
option routers 192.168.2.1;
next-server 192.168.2.1;
option root-path "/nfsroot";
filename "default.colo";
option host-name "cobalt";
All these values should match your choices and you should have a DNS server running on the machine mentioned - in my case 192.168.1.1.
You need to download some files for the installation and place them on the server for the Cobalt to access.
cd $HOME
wget http://ftp.debian.org/debian/dists/Debian3.1r6/main/nfsroot.tar.gz
cd /
zcat ~/nfsroot.tar.gz | tar -xvf -
The changes made to the DHCP and NFS servers should take effect before the installation, so these need to be restarted. As root, type:
/etc/init.d/nfs-user-server restart
/etc/init.d/dhcp3-server restart
After this, the actual installation can start.
Make sure that your server's /etc/hosts file has the correct entries for the server and the Qube 2:
192.168.2.1 cobalt.yourdomain.com cobalt
192.168.2.2 server_name.domain.com server_name
Also make sure that your hosts.allow and hosts.deny file are okay - else the two boxes (Qube and server) will not be able to see each other.
Connect the Qube to the server using the null modem cable. Open a terminal on the server and start a terminal emulation program like screen or minicom. I used screen.
screen /dev/ttyS0 115200
Now start the Qube and hold down both the left and right cursors so that it boots from the network. On the LCD panel on the Qube you should see:
Net booting
After some time, you should see a boot menu on the LCD:
Network (NFS)
Network (TFTP)
Move the cursor key to the first option and press the Enter key.
There may be an additional choice next:
Install SSH
Install serial
Choose the second option. Soon the LCD will show Loading Debian-installer.
The boot partition for the Qube is required to be ext2 revision 0 and this should be the first primary partition. You can make this partition manually but the best option is to use the automatic partitioning guide and let it make the partitions for you.
Once the base install is done, the installation of the rest of the software happens across the net. You need to have at least half-decent internet access else it will take a very long time.

Possible problems
The Cobalt I got had only 16 MB of RAM so after I had got it booting, there was a kernel panic and the process stopped.
Luckily I had a 64MB strip of RAM from my other Cobalt so I slipped that into the vacant RAM bank. This configuration did not work so I pulled out the 16 MB strip.
I later found out that I could use both strips but the bigger SIMM module must be in slot 0 (closer to the processor) than the smaller SIMM module.
I forgot to turn on IP forwarding on the server; if you do likewise, then as root run
echo 1 > /proc/sys/net/ipv4/ip_forward
I also forgot to do anything to ensure IP masquerading on the server; for this I ran
/sbin/iptables --table nat --append POSTROUTING --protocol all --source 192.168.2.2 --jump MASQUERADE --out-interface eth0 --verbose
You can watch the progress of packets by using this:
/usr/bin/watch /sbin/iptables --table nat --list --verbose